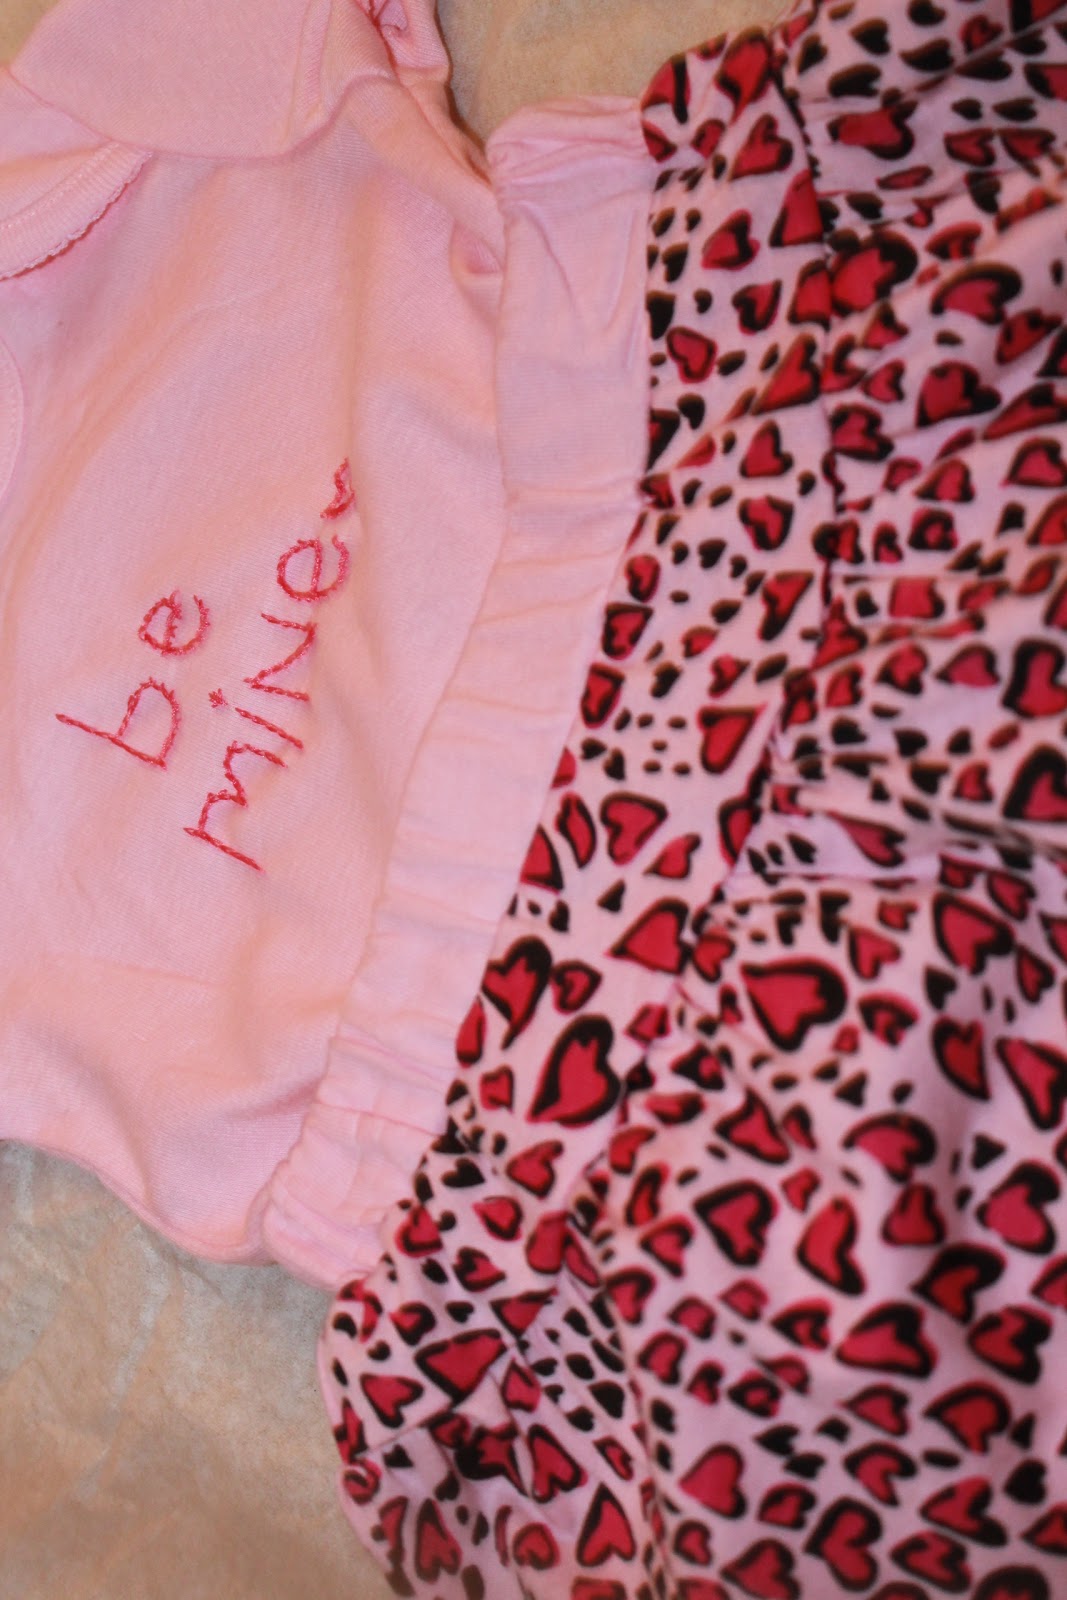
02 January 2012

Valentine's Onesie

I might be a bit obsessed with making holiday outfits now that my friends are starting to have babies.  Either that, or I just like making cute things.  It is much easier to make clothes for kids than it is for myself.  Less fabric, less sewing, and the best of all...they don't have to be fitted with zippers.


Things you need:
-Pink onesie, plain
-Needle
-Scissors
-DMC floss or thread
-Hoop
-Matching skirt to complete the outfit!

Instructions:
1. Decide where you want the stitching.  Center the stitching area in the hoop.

2. I decided to wing the font, but it would probably be quicker to write it out with a chalk pen prior to starting.  I wasn't going for perfection--I wanted to make it a little sloppy / child-like.

3. As I didn't have matching DMC floss, I decided to use all-purpose thread.  I cut two pieces of the same length, pulled them through the needle and then tied all four threads into a single knot.


4. Using a backstitch, stitch out the letters.  Make sure to tie a knot after finishing each letter.


13 December 2011

Christmas Onesie - Boy

Looking for something cute for your handsome baby boy to wear on Christmas?  This onesie is easy to make and the colors are versatile--he can wear it year round.


What you need:
-Onesie
-Ribbon
-Fabric scraps
-Two buttons
-Needle and thread
-Scissors
-Lighter

Instructions:
1. Cut ribbon to desired length.  Burn the ends with a lighter to prevent fraying.
2. Pin ribbon to onesie to reduce movement while sewing.  Hand sew ribbon to onesie making sure to tie large enough knots so that they do not slip through the onesie.

3. Cut two 4 x 6 inch pieces of fabric.  With like-sides together, sew around the outside leaving approximately one inch to pull the fabric through.  Flip the fabric inside out and sew the one inch gap. 
4. Cut one 6 x 2 inch strip of fabric.  Fold under and sew 1/4 inch on each side (hot dog style).  With like-sides together, sew the two ends together.  Turn inside out.
5. Pull the rectangle halfway through the loop you've just made.
6. Take the bowtie to the onesie.
7. Sew on two buttons making sure they are VERY secure.  I keep the 'extra' buttons that come with a new shirt or pair of pants, that way, I have plenty of extra buttons laying around!

Pepperoni & Cheese Croissants

Another pinterest steal!  But, I 'churched' it up (as Jackie would say).

What an EASY and FAST weekday meal that is so DELICIOUS!


What you need:
-Canned croissants
-Pepperoni
-Mozzarella (I used fresh)
-Fresh garlic, minced
-Ricotta cheese (whole milk)
-Spaghetti sauce

Instructions:
1. Preheat oven to 350 degrees.  Open can of croissants and lay them out flat. 
2. Spoon a bit of garlic and 1 tsp of ricotta cheese on the larger end of the triangle.
3. Place a small slice of mozzarella cheese and six slices of pepperoni on top of the other ingredients.
4. Roll into a croissant.  Try to keep all of the ingredients covered by the croissant dough.
5. Bake for 11 minutes, or until golden brown.
6. Serve with heated spaghetti sauce.

Shotgun Shell Wreath

Thank you pinterest, for jump starting the creative side of my brain!  I went out to the range to shoot skeet this past weekend and remembered the super cute shotgun shell wreaths I saw on pinterest.  So, of course, I felt the need to collect a bunch of shells in hopes of creating something wonderful!

I wanted my wreath to look a little different from these ones I've seen before:


Things you need:
-Shotgun shells
-Wreath (I purchased mine at the dollar store)
-Floral wire
-Ribbon / tulle / raffia / etc.

Instructions:
1. Drill a hole in each shotgun shell ~1/2 in from the top using the smallest bit you can find.  Continue drilling through the other side of the shell.

2. String six shells onto a piece of floral wire making sure to fasten the ends--I shoved mine back through the first hole.

 
4. Attach shells to wreath using floral wire.
5. Tie a ribbon to top of wreath.  I wish I had raffia, but I had leftover tulle from making tutus.


03 December 2011

Easy Wreath

Alright, so I was finally inspired enough to create a blog.  We'll see how long it lasts.  Let me mention that I have very little patience when it comes to crafting, so if you see a difficult-looking item, don't be fooled.  Same goes for fashion--if I can pull it off, so can you!


Let's start off with a super simple wreath that my friend and I made for her mom (seminole-inspired, of course!).  Future crafts will have step-by-step photos, sorry.


Things you need:
-14in craft wreath
-Yellow silk ribbon, ~12 yards
-2 sheets of felt, 8.5 x 11 in
-Scissors
-Tape
-Glue gun and glue
-Needle and thread


Instructions:
1. Tape the end of the ribbon to your wreath.  Making sure to cover up the tape, begin wrapping the wreath.  Finish your wreath by gluing the end of the ribbon to the back of the wreath.
2. Cut different size circles out of your foam sheets--the bigger the circle, the bigger the flower.  No need for the circles to be perfectly round, you won't notice a difference later.  Cut the circles in a spiral from the outside to the center.  Starting from the center, roll the spiral into a flower.  Tape the bottom of the flower so that it will hold it's shape while you finish the rest of the flowers. 
3. Roughly stitch the bottom of the flowers with similar color so that it retains it's shape.
4. Arrange flowers on the wreath and then glue in place.


What we could have improved:
-If you're going to use a straw wreath, you're better off with yarn.
-If you're going to use ribbon (like we did), use a foam wreath so that it lays flat.